A coated garage floor changes how the whole space feels. Cleaner. Brighter. Easier to live with. If you are wondering what the project involves, this walkthrough explains every step from the first visit to the final handshake so you can plan with confidence.
A quick note on finishes
Most Higgins garage projects use one of three finishes: flake, metallic, or grind and seal. The prep is similar for all. The middle steps vary to create your look and the traction level you want.
Step 1: On-site visit and clear pricing
One of Higgins’ project specialists meets you at home to:
- Assess the slab for cracks, pitting, and moisture.
- Learn how you use the garage, like parking, projects, a home gym, or pets.
- Review finish samples and traction levels.
- Confirm edges, stem walls, steps, and where the coating should stop.
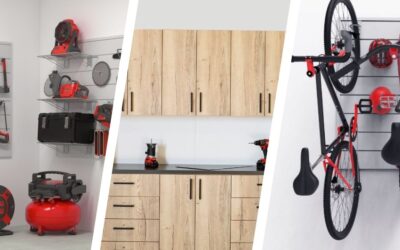
- Talk through optional garage cabinets and slatwall if storage is on your list.
You receive a written estimate with scope, prep details, and timing considerations for your Wichita home. If storage is part of the plan, we align the layout with the floor so the finished space feels cohesive.
Step 2: Project-day preparation
Before machinery rolls in, the crew protects adjacent areas, sets up dust control with HEPA filtration, and confirms temperature and humidity are in range. You remove vehicles and personal items. We handle protection and cleanup.
Step 3: Mechanical grinding and repairs
Strong coatings start with the surface profile. We open the concrete with diamond grinders, then:
- Chase and fill cracks and control joints as specified.
- Repair spalling or pits for a flatter, more consistent finish.
- Check moisture and address any areas that need special treatment.
You will see clean, uniform concrete with a matte scratch pattern designed for bonding.
Step 4: Base coat
A high-performance base coat creates the bond with your slab.
- Flake systems use a fast-curing base that supports full-coverage broadcasting.
- Metallic needs a longer open time to create flowing, marbled movement.
- Grind and seal treats your prepared concrete as the base. The sealer steps come later.
Your estimator will explain which chemistry fits your goals and site conditions.
Step 5: Build your look
This is where the style happens.
- Flake: Colored chips are broadcast across the surface until it is fully covered. Blends can be subtle, high contrast, or custom to match your space.
- Metallic: Pigments are poured and moved to create depth and motion. A strong choice for entries or flex spaces that connect to the garage.
- Grind and seal: The concrete itself is the hero. After grinding to the agreed finish level, a clear sealer protects the natural look.
Traction can be tuned here or in the final coat depending on the system.
Step 6: Smooth and seal
Once the finish is set, flake floors are scraped and vacuumed for a uniform texture. A clear, UV-stable topcoat is applied to lock everything in and make cleaning simple. Traction additives are adjusted to the level you chose for wet days and winter slush.
Step 7: Cure and first use
Return-to-service timing depends on temperature, humidity, and the finish you selected. Your estimator will give precise guidance for light foot traffic, moving items back in, and parking vehicles. First-week tips include avoiding sharp metal edges, placing soft pads under kickstands, and keeping door seals from sticking to fresh topcoat until you are cleared to close fully.
Step 8: Final walkthrough and care
We review the edges and transitions with you, answer questions, and go over care and warranty.
- Everyday care: Most weeks, a sweep or rinse is enough. Use mild cleaners for heavier spills.
- Seasonal care: Rinse off winter salt and sand as needed.
- Warranty: Written coverage is included. Flake systems carry a 15-year system warranty, with lifetime protection for color stability. Cabinetry carries a 10-year cabinet warranty.
If you planned garage cabinets or slatwall, installation is scheduled so storage and flooring come together neatly.
What influences price and schedule
- Size of the garage and whether stem walls or steps are coated
- Concrete condition such as crack repair, pitting, or leveling
- Finish selection and traction level
- Moisture or temperature constraints during your target dates
Your estimate spells these items out so there are no surprises.
Quick checklist you can save
- Pick your finish: flake, metallic, or grind and seal
- Choose color and traction level
- Decide on stem walls, stairs, and transitions
- Plan storage so floor lines and footprints look intentional
- Schedule around vehicle access and cure guidance
FAQs
Is it slippery when wet?
Traction is tuned to your preference. Ask about light, medium, or extra-grip options.
Will hot tires or oil stain the floor?
Systems are designed to help resist common garage chemicals and hot tire pickup. Clean spills promptly for best results.
Can you coat during cold or humid weather?
Yes, with the right chemistry and job planning. Your estimator will advise based on seasonal conditions.
Do I have to empty the entire garage?
Vehicles and loose items must be off the floor. If you need help with heavy items, let us know before install day so the plan fits your needs.